Instrument Module
In this section we show you how to use the Instrument Template to create your first Instrument Driver Module.
Step 1. Creating and inserting the module
First, create a module similar to how we created one in the Module Creation section, but now select Instrument Template as the Module Type.
After creating the new Instrument module, insert it into the Main.vi.
Step 2. Set up Config Keys
Every module has a Module Table that contains the config keys and their variables. Keys in the Config group define the module’s basic operation, are saved, and must be retained after the program is closed. See the Module Table section for details.
Config keys are usually basic variables needed before connecting to an instrument, for example the physical channel. To initialize the
config keys, write the key names into the string array in Initialize Module Keys.vi, which can be found in the Module Overrides folder.
In this example the instrument is a NI USB-6009 and communication uses the DAQmx package.
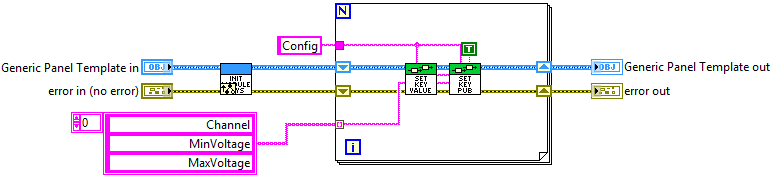
You do not need to subscribe to the config keys in this template; subscription happens after initialization. If you add a key while the program is running, subscribe to that key (even in the module that created it).
Step 3. Override required functions
After setting up the config keys, override the functions tied to the instrument lifecycle. These functions are in the Instrument Overrides folder.
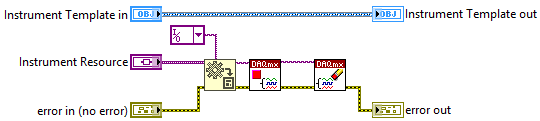
Connect to Instrument.vi
This function runs whenever the user attempts to connect to the instrument and should contain the logic required to establish the connection.
To get a config key value, use MT Get Key Value.vi. Set its Group input to a “Config” constant string and Key to the key name.
It returns a Variant value that should be converted to the appropriate type. The Instrument Resource output of Connect to Instrument.vi
should be the instrument reference or task.

After initialization the template will automatically try to connect to the instrument.
Close Resource.vi
This function runs whenever the user closes the instrument. It should implement disconnect and clean-up logic.
The Instrument Resource input is a Variant type and should be converted.
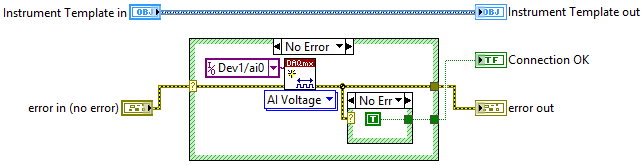
Check Connection.vi
This function runs periodically and immediately after connecting; it should verify the connection status. Use a function that checks the connection or creates an error if the instrument is disconnected or unavailable.
Instrument Actions.vi
Use this function to implement instrument-specific commands with parameters.
In this example we implement the “Read” command, where the instrument reads a given number of samples at a specified sampling rate.
To get the instrument’s reference or task, use the Get Instrument Resource.vi. The sampling rate and number of samples are command parameters
and are available through the Parameters input.
The Parameters input and the output of the Get Instrument Resource.vi are Variant types and should be converted.
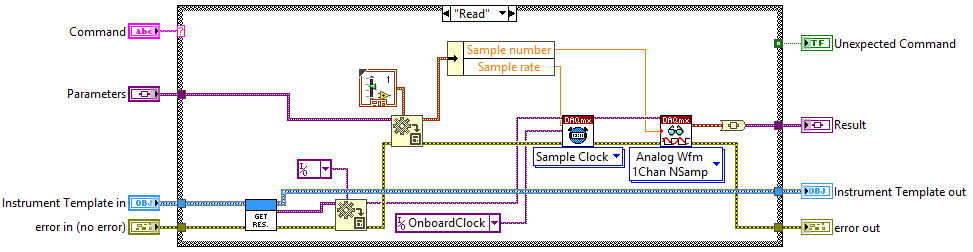
Add every command that the module uses to the array in the Interface Module Commands.vi as well.

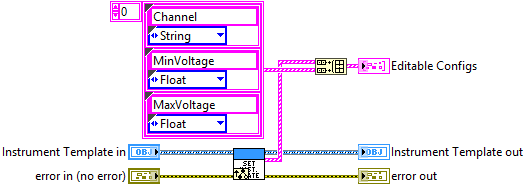
Set Editable Configs.vi
If you want users to edit some config keys from the pop-up menu, add those keys to the array in the Set Editable Configs.vi.
Step 4. Create the UI
Create the UI in the Actor Core.vi. For this example, the UI shown below was created.
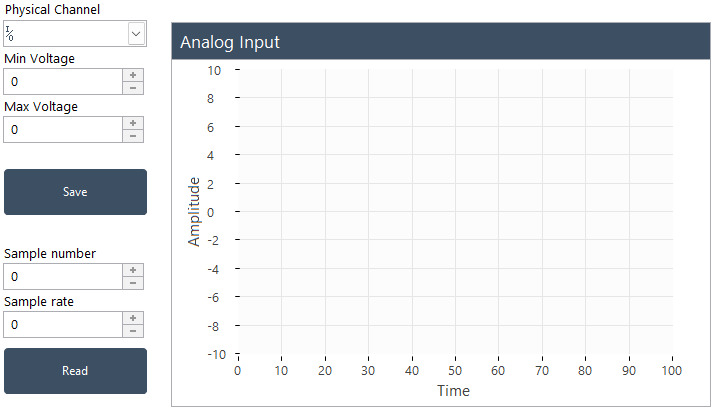
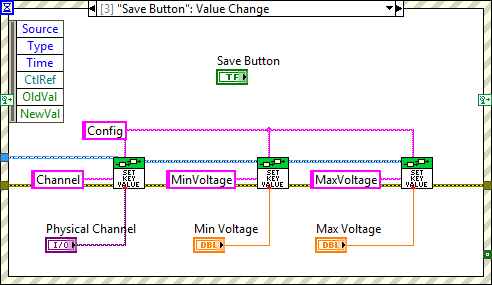
In this example, clicking the Save button stores the current values of Physical Channel, Min Voltage, and Max Voltage to their
respective config keys. Use MT Set Key Value.vi to set a config key value.
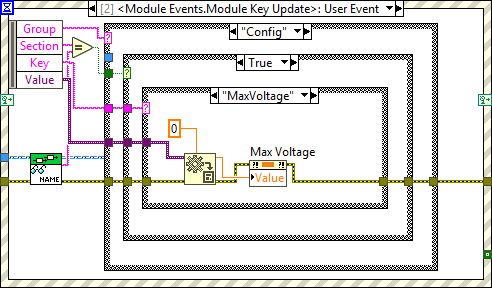
Config key values are loaded every time the program starts. The UI will not automatically show previously saved values. Whenever a module key’s value changes (including at program start), the Module Key Update event runs. Update control values via their Property Nodes in that event.
The Value of the updated key is a Variant type and should be converted.
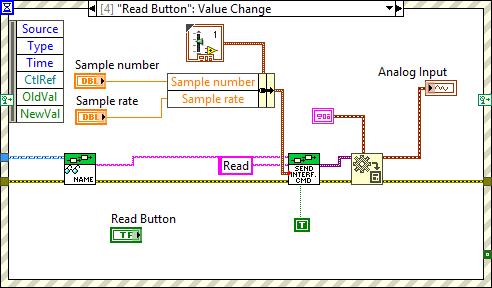
To read data from the instrument, use the previously implemented Read command. Call the Send Command to Module.vi and get the
module name with the Get Module Name.vi. The Data input of the Send Command to Module.vi should be the command Parameters, and
the Reply will contain the measured data.
The Reply of the command is a Variant type and should be converted.