Installation
Step-by-step instructions for installing the ProDSP Core Framework.
Steps
- Check out the ProDSP-CORE-for-LabVIEW repository from GitHub. To gain access to the repository, fill out this form: https://forms.gle/CYxGemAJmGoPG5uE8
- In the
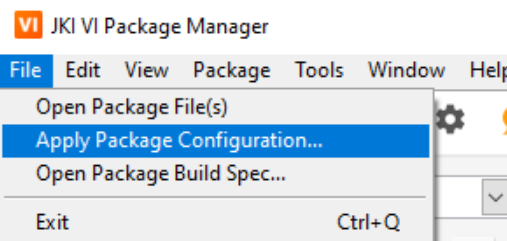
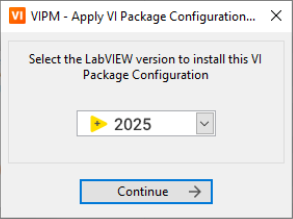
resources\Packagesfolder you will find a Package Configuration file calledRequired and Optional Packages.vipc - Use the JKI VI Package Manager to navigate to the File >> Apply Package Configuration… menu, then select the desired LabVIEW version:
If the navigation bar is not visible for you in the VI package manager, press the Show Menubar button in the top icons.
- Restart your system when prompted
In case of instability of the VI package manager install, locate the included packages individually by searching for them manually or contact us for troubleshooting support.
- Open the LabVIEW project file
Core Framework.lvprojin your LabVIEW Development Environment. (You can rename it to any specific project name before opening.) - Wait until the project has fully opened.
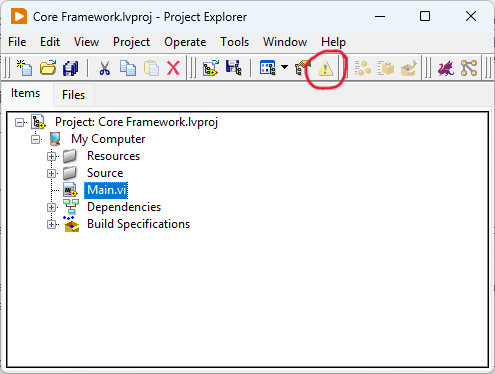
The first time you open it, LabVIEW compiles all VIs and places the compiled code in a temporary memory. This takes a few minutes. The process is complete when the yellow triangle on the toolbar turns gray.
-
There may be cases where errors still appear in the error list even after this, but they will be resolved by opening
Main.vi. OpenMain.viand check for any remaining errors in the LabVIEW Error List (CTRL + L). If any errors appear in the list, resolve them (usually some of the dependencies are missing). -
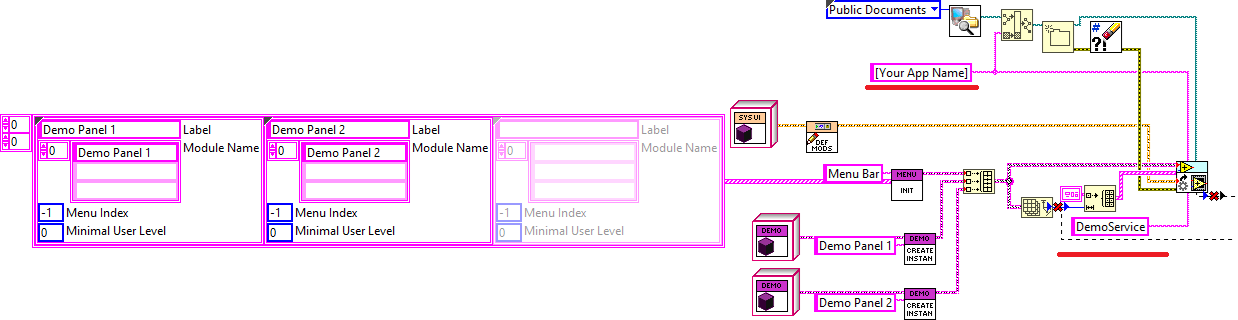
When preparing the program, the first step is to rename the program and the Remote TCP Service name in
Main.vi, and, if necessary, set the working directory.
If the working directory is not changed, the temporary files required for the program to
run — such as the configuration database — will be created by default in the C:\Users\Public\Documents\<project name> folder.
- Congratulations, now you can run the application (CTRL + R)! You can follow the instructions in the next chapter to create your first module.